Categories
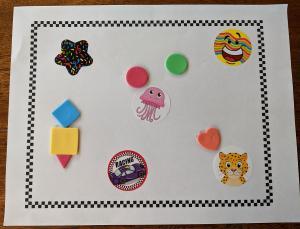
Create your own work of art using the stickers and frame.
Before your child can learn to write, they must develop the small/fine motor skills which are used to grip a crayon/pencil. Peeling the back off the stickers and placing them in the frame provides your child with the opportunity to develop these skills.
To prepare young children for writing, provide them with opportunities to use their hands and fingers. This will help them later when they hold crayons and pencils.
- Open and close containers with lids
- Cut with child-safe scissors
- Finger paint with paint, shaving cream, yogurt, or pudding
- Use a paintbrush
- Play with play dough and clay—roll, smoosh, pat, pound, and use tools like popsicle sticks or stamps
- Lace Cheerios onto pipe cleaners
- Lace pipe cleaners into the holds on a colander
- Draw, scribble, or write with crayons, pencils, and markers
- Put together puzzles
- Build with small blocks
Supplies:
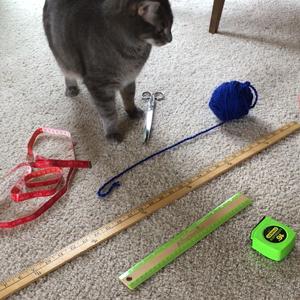
- Ruler (12" or 18" or 36") or measuring tape
- Yarn or string
- Scissor
- A stuffed animal or your pet
Directions:
- Measure, as best you can, your pet or stuffed animal and determine its length in inches.
- After you know how many inches, cut a piece of string or yarn the same length.
- Take this piece of string and measure items around your house. How many cats (or hamsters or dogs, etc.) long is your kitchen? Your table? Your bed?
Please leave a comment below, tell us what you used to measure items around your house.
You can watch this project at: https://www.youtube.com/watch?v=jCU1Ks8mBf0
Supplies:
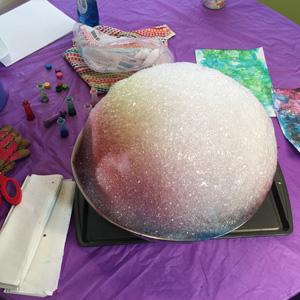
- One small block of dry ice (about 1 lb.) broken into large pieces. (Do not touch dry ice with bare skin, it will burn!)
- Large bowl on a tray
- Table covering
- Warm water
- Dish soap
- Food Coloring
- Paper (any kind)
Directions:
- Pour warm water into the bowl.
- Add 2-3 squirts of dish soap (it may help to stir the solution gently at this point although I didn't).
- Add a chunk of dry ice using tongs or garden gloves.
- As bubbles rise up, add food coloring (2-4 colors).
- Lay paper over the colorful bubbles and press gently into bubbles. Add a different color and repeat with another piece of paper.
- Keep adding warm water and chunks of dry ice. Or start over with a fresh batch.
- Enjoy your wonderful bubble art!
Watch this project at: https://www.youtube.com/watch?v=852TC3_bSbU&list=PLMEg2Dd0dSFctLfDQxsL5…


