Categories
Take and Makes for this project will be available starting this Friday, March 12, 2021.
Watch this project at: https://youtu.be/8avBll-4qnc?list=PLMEg2Dd0dSFctLfDQxsL5SmuE8zkwQFmu
Supplies:
Materials included in kit: circle template, cardboard, piece of string about 36”
Materials needed from home: crayons, colored pencils or markers, scissors, glue stick, sharp pen or pencil (to poke holes)
Directions:
- Take template of color wheel or print out a copy below.
- Color in the sections red, orange, yellow, green, blue, and purple. For an accurate color wheel, red should be opposite green, yellow opposite purple, and blue opposite orange.
- Cut out your circle template.
- Glue your circle to the piece of cardboard and cut it out again.
- Carefully poke two holes in the center of the color wheel, side by side.
- Thread your string through both holes, then tie the ends in a knot.
- Hold each end of the string. The cardboard circle should be about midway between the ends. Wind the string by spinning the wheel in a motion similar to a twirling a jump rope.
- Gently pull the string tight to get the wheel spinning. If you continue moving your hands in an in and out motion, the circle should continue to spin.
Explanation:
As the wheel spins, what do you notice about the colors? The colors disappear!
As the wheel is spinning fast, your eyes blend the colors together and the color wheel looks white.
White light, like sunlight, is made of all the colors in the rainbow. When light hits a colored object, most of it is absorbed and only one color is reflected. A red object, for example, absorbs almost the full spectrum of light, reflecting red only. When the color wheel was spinning fast enough, the colors changed faster than your eyes could see the individual colors and send the signals to your brain, so the reflections of all of the colors blended together and you saw white light!
Recently, Dr. Seuss Enterprises worked with a group of children’s literature experts to review its catalog of titles and announced that it will end the publication and licensing of six books due to their racist imagery: And to Think That I Saw It on Mulberry Street, If I Ran the Zoo, McElligot’s Pool, On Beyond Zebra!, Scrambled Eggs Super!, and The Cat’s Quizzer.
Pikes Peak Library District does not plan to withdraw copies of these titles from our physical and digital collections. While we continue to stand against racism, the freedom to read is one of the basic foundations of our Library District. We believe it’s in the public’s interest to provide a wide diversity of views and expressions, including those found in historical titles that provide insights into our growth and evolution as a society.
Parents and caregivers can use titles such as these as an opportunity for enlightening and productive conversations with children about the historical context in which these Dr. Seuss books were written, in addition to the problems with the racial stereotypes and prejudice found within them.
As a Library, we are actively working to ensure that a multitude of diverse voices are represented within our collection. We invite you to discover the Library’s collection, which will always include a broad range of human experiences, personal stories, and perspectives.
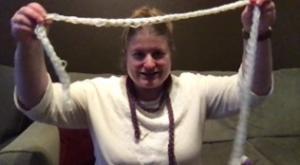
Watch this project at: https://youtu.be/xJ0lqs_BoLg?list=PLMEg2Dd0dSFctLfDQxsL5SmuE8zkwQFmu
Supplies:
- Yarn
- Your fingers
Directions:
- Take the end of the yarn and loop it around the pointer finger of your non-dominant hand (if you are right-handed, tie the knot around the pointer finger of your left hand; if you are left-handed, tie the knot around the pointer finger of your right hand). Optional: Tie a knot to keep the yarn loop in place.
- On the same hand with the knot, weave the yarn around your fingers. Go behind your middle finger, in front of your ring finger, around your pinky, behind your ring finger, in front of your middle finger, and behind your pointer finger.
- Repeat the weaving pattern so that you have two loops of yarn around each finger.
- You want the loops of yarn around your fingers to be loose enough to slide off your fingers but tight enough that they don’t fall off accidentally. Use your thumb to hold the loose end of the yarn tight.
- Take the bottom loop of yarn on your pinky finger and pull it over the top loop of yarn and off your finger. You should have only one loop of yarn on your pinky finger.
- Repeat for each of your fingers. Pull the bottom loop of yarn over the top loop and off your fingers.
- Push the remaining loop of yarn on each finger down toward the base of your fingers. They are now the bottom loops of yarn.
- Repeat steps 3-8 until you’re ready to be done with your finger knitting.
- To cast off (or end your project), cut the yarn so you have about three inches left. Thread the end of the yarn through the loop of yarn on each finger, starting with the pointer finger and ending with the pinky.
- Pull each loop of yarn off your fingers and pull the loose end tight. Tie the end of the yarn in a knot around one of the loops of yarn to fasten. Cut off the extra “tail” of yarn.
- If you would like to take a break while working on your knitting, use a long, rounded object (a pen, pencil, chop stick, or knitting needle). Slide the loops of yarn off your fingers and onto object and put in a safe place until you’re ready to start finger knitting again.
To restart your project, slide the loops of yarn back onto your fingers. Remember that the loose end of thread will be on your pointer finger and that the knitting will lay against the back of your hand. Repeat steps 3-8 to continue knitting.


