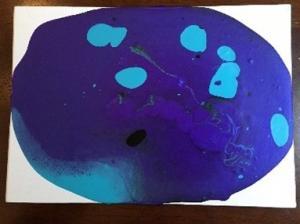
Take and Makes for Paint Pouring, for ages 9-12, will be available at area PPLD libraries starting Friday, May 7, 2021.
Watch this project at: https://youtu.be/sdIewTwn6lo?list=PLMEg2Dd0dSFctLfDQxsL5SmuE8zkwQFmu
Supplies:
Included in kit: 1 canvas, 1 container of Floetrol (stabilizer), 2 containers of acrylic paint, wooden craft sticks for stirring, small cups for mixing
Needed from home: Newspaper, plastic, or foil (to cover your workspace)
Directions:
- Cover your workspace with newspaper, plastic, or foil to contain the mess from the paint. Consider wearing an old shirt or apron and push your sleeves out of the way of the paint.
- Pour the stabilizer (the Floetrol) into three plastic cups. Add a separate paint color to each plastic cup and mix with wooden stirrers. For best results, keep a 1:1 ratio of stabilizer to paint in the disposable cups. You can combine the two paints in one cup to make three colors.
- Decide which technique you want to use and follow those instructions for prepping the paint. (See “techniques” below).
- Pour the paint onto the canvas until it covers the whole thing.
- If you are not happy with the design, while the paint is still wet you can tilt the canvas in any direction and the paint will change before your eyes!
- As an optional step you can flick or drip rubbing alcohol or hand sanitizer onto the canvas and watch the awesome things it does to your creation. A little goes a long way.
- One you are done pouring put in a dry place and wait 10 hours for it to dry fully.
Techniques:
- Dirty Pour: After mixing the medium into each color, layer each color into a single cup. The first color you pour into the cup will be the last to appear on your surface and likely the most prominent. Pour straight on your surface or place surface face down over cup and flip the entire thing over. The paint will pour out of the cup and onto the surface of your canvas.
- Direct Pour: Keeping your color mixtures separate, alternate pouring directly onto the surface. Tilt surface to create a marbleized pattern.


